Thursday, 18 October 2018

Boring Together | Allara Bamforth

Happy Thursday!

I'm back on the blog today with a layout that turned out more an like an art journal piece using the fabulous 'Happily Ever After Collection'. I rarely plan anything I do, I kinda just go with it and see what happens, sometimes it works and sometimes its blah but you can never go wrong with bright colours I say.

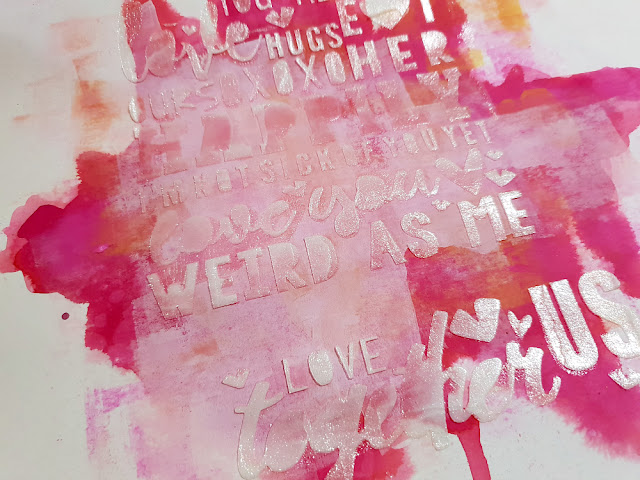
I love just slapping paint on the backgrouds and making them my own. So with this piece I've added Flutter Colour Paint in a cascading rainbow effect and used my brayer to smoosh them across the page.

Using the I Heart You Stencil and the Half tone stencil, I have added some detail on the background with the paint and used my posca pens to add a few bits and bobs.

Using the Everyday Etc Filler Cards and some quotes from Everyday Etc Cards from the Happily Ever After Collection, I've matted up the gorgeous Tim Holtz paper dolls and added the 'Let's Be Boring together' title. To this I've added some stickers from the Happily Ever After Sticky Quotes and i've embossed a wood veneer from Happily Ever After Wood Veneer Bits.

Well that's it from me. Thanks for taking a peek.

Till next post,


Monday, 15 October 2018

Teenager or Toddler? - PL with Adele

Hi everyone!

Although there are no teenagers in my household, I was excited when I recently found the Xtreme Teen collection at the Flutterby Create By The Lake Retreat. Archer certainly has the attitude of a teenager at times, so I thought I had better pick up some bits and pieces from the collection!


Today I have used the Everyday Etc cards and Sticky Quotes to document a page in my Project Life. I love combining some of the Flutterby labels in my PL pages to add snippets of journaling to my pages too.


I think this card from the Everyday Etc Xtreme Teen pack is very suitable for the current cheekiness that this little guy was showing this week!


I think that it is very handy to also have some basic Flutterby goodies, such as alphas, labels and the tiny sticky quotes (tiny word stickers) to add information and subtitles to my PL.


I challenge you to use one of the "themed" collections outside the box for a completely different topic on your next scrapbook page!

Have a rad week,
Adele

Saturday, 13 October 2018

Peace Love Pineapples | Sue Plumb


Hi everyone!
I am here today to share my latest design team project created for Flutterby Designs - a mixed media layout featuring the 'Good Vibes Only' collection and Flutter Colour paints. I documented a photo of myself, my hubby and a couple of our mates that was taken at a local event on Australia Day. (In case you are wondering how the pineapples are relevant, the event featured a pineapple throwing competition.)


To go along with the theme of Australia Day, I chose a green and gold colour scheme. I used Flutter Colour paints to paint my background - first using a brush, then a brayer, and finally my fingers to add some highlights. 


On top of the paint I added some Colour Blast Colour Paste using the super cute 'Be a Pineapple' stencil. I then dropped some green Colour Blast Colour Artist Ink randomly over the top before drying it off. 


Next I took some of the 'Good Vibes Only' Everyday Etc cards and created a layered mat for my photo; then added some frayed gauze for texture before adding my photo on top. I tore up some small pieces of washi tape from the 'Good Vibes Only' kit and placed them around the page.

I fussy cut my peace love pineapples title piece from another of the Everyday Etc cards, overlapping the corner of photo with it, and popping some foam tape under the corner to help keep it up off the page. I then added the hello there flair button from set #286 on top.


I added some stickers from the 'Good Vibes Only' Sticky Quotes sheet around my photo as well as some wood veneer pieces. I also added the good vibes only wood veneer further down my page. I decided my page needed a little more black so I added a few black Tiny Sticky Quotes to the page.


To finish off, I added some enamel dots; my handwritten journalling; a few stamped phrases; and some splatters of black ink.

I am super excited to add that I actually made my FIRST EVER process video for this page. I would love for you to pop over and check it out...


Thanks for stopping by today so I could share this with you.
Until next time, happy scrapping!

Wednesday, 10 October 2018

Family Fun | Rachel Dutko

Hi everyone

It's Rachel back with you today for another share of Flutterby goodness!


I created my background  using some Tropicana Teal Flutter Colour Paint 
on my Gel Press plate.
I then used a Mmm Pie stencil and navy ink for some subtle detail in the background.


For my title I used the FAMILY from the Fair Dinkum Chrissy Die Cut Bits & Bobs pack 
and the FUN from the Good Vibes Only Die Cut Bits & Bobs pack.


I added some page tabs, ticket, flair and sticky snippets
I also added some Charm's Creations stars.


 I layered some Everyday Etc filler cards from the 'Happily Ever After' 
collection under my photo.


I finished off my page with some wood veneer stars, enamel dots
and of course some black ink splatters!


Thanks for looking
Rachel x x


Sunday, 7 October 2018

Hello Adventure | Tamara Buckler

Hello Flutterby Friends,

It's great to be back with you for another share today. This page was a fun one to create. I'm a little bit obsessed with the Large Alpha Stencil, and love making titles with the letters - its just such a cool crisp font!

I had this fun selfie with my daughter at a tree climb adventure park, and I have printed it a bit larger in 5x5, and really wanted to make it my focal point.


To accentuate this focal point I drew 'Hello' on some black card stock using the Large Alpha Stencil and fussy cut it out just using some scissors. I also cut out some asterix while I was at it, and tucked them around the page. 

Now that I had the 2 main elements sorted, I began to build a matt behind my photo. To do this, I pulled a heap of Everyday Etc Cards from a variety of collections, focussing on B&W papers, and anything in purple/pink. I cut them into random sizes to create texture and interest, and laid them up behind my pic. I also tucked in some frames, and some page tabs in similar colours and textures. 


I added a piece from the Kraft Fussy Cuts to the top left of the photo, and tucked various pieces from the black Snippet Strips and White Sticky Quotes around the page. I also added a Flair Button to embellish the page, which I have altered, as the colour didn't suit - I'm not entirely happy with the way this worked out, but I figure that's a good excuse to order a few more!


To finish off the title I added the word 'Adventure' using the Purple Sticky Alphas, which I stuck to be a piece of white cardstock, so I could layer it over the larger title word.


And to balance out the page, and finish things off, I added a strip from an Everyday Etc Card, and another Snippet Strip with my journalling at the bottom of the page. 


Thanks for stopping by today to check out my page. I do apologise for the light in some of these pics, we have had rain non stop since I created this layout and have struggled to get a good pic because of the gloominess. I'm definitely not complaining about the rain, so I figured these pics would do!

Big Loves,
Tam xo


Thursday, 4 October 2018

Beautiful You | Belinda Spencer

Hey Flutterby peeps!!

Belinda here today to share  my latest layout featuring a sweet mix of slightly less recent Flutterby products that I have been hoarding in my stash.

'Beautiful You'


I have gone for a minimalist look on this layout with very little mixed media. Just to show that it is ok to keep it clean sometimes. 


I used the Shine Bright Like A Diamond Stencil along with a black journalling pen on my background.  I diluted the Green Limousine and Tropicana Teal Flutter Colour Paints with water and flicked some droplets over the background. I tore a strip from a Blank Palette Everyday Etc Filler Card with the same pattern as the stencil and slipped that into my stack of chopped up filler cards.


I used some filler cards from the Mixed Lines set which I cropped to size to sit behind my tiny photo. You can find these cards in the store HERE and the good news is that they are currently on sale. Winning!


I slipped a stencil word in to the right of my photo and slightly underneath it to hide the staples that I secured it with.


I have also used a Super Cool Page Tab, some stars fussy cut from the Stars Photo Cut Out sheet, the Frame 8 Photo Cut Out, words cut from the Cool Snippet Strips, Green Sticky Alphas and Neon Enamel Dots.


Well that's all from me today. I hope you are feeling inspired to keep it clean on your own layout and try a minimalist look. 
Thanks for stopping by the blog today.

Cheers
Belinda


Monday, 1 October 2018

This Is Us Documented | Sue Plumb


Howdy peeps!
Welcome to October and happy Monday! (If you are smack-bang in the middle of school holidays like we are here, you have probably lost track of what day it is by now.) I am here today to share my latest design team project - a fun mixed media scrapbook layout featuring the 'Happily Ever After' collection and a photo of my hubby and I.


I started my page by creating my background on a sheet of white cardstock. (I used Bazzill Marshmallow so that it could handle the wet media.) First, I applied some Colour Blast Colour Artist Inks - 'Cranberry', followed by 'Slipper'. I added some extra water to move them freely around the page and help them to blend. I then dried it off with a heat gun before going back and splattering clean water over the top with a brush to take out some colour; leaving it to sit for a minute before soaking it up with some paper towel.


I then added some Flutter Colour paints - a touch of Cotton Candy Pink, as well as Sunshine Yellow; which I spread randomly on top with a brayer. After that had dried, I went back with some Arctic White and brayered some (more heavily this time) to pull the colour right back where my photo was going to be placed.

For the final layer in my background, I wanted to add some subtle detail and texture, so I used  the 'Happily Ever After' stencil with Colour Blast 'Snow White' Colour Paste before setting it aside to dry thoroughly. 
Look at the gorgeous shimmer...


With my background complete, it was time to add some papery layers on top. I used 'Happily Ever After' Everyday Etc filler cards, cut into various sized pieces to create a layered photo mat before adding my photo on top. I also tucked one of the coordinating 'Happily Ever After' page tabs in behind my photo and secured it with a staple.


I used some torn pieces of the lip printed washi tape from the 'Happily Ever After' Kit - placing my "kisses" randomly around my page. The title piece for my page - this is us documented was cut from one of the 'Happily Ever After' Everyday Etc cards.


I used a variety of heart stickers from the 'Happily Ever After' Sticky Quotes sheet scattered around the page. Also from the same sheet was the you+me=love sticker, which I popped up on some foam tape next to my photo, along with the for ever and ever banner. 


I love adding elements directly onto my photos. Here I added the together sticker in the corner of my photo, and then the you+me phrase sticker below it. (The Sticky Quote sheets always have a great variety of stickers to use, and they stretch a long way too!)
The final embellishment I added was the you are the bacon to my eggs flair button from the 'Happily Ever After' Flair Button Set 1


To finish my page I added a few small splatters of blue mist and I was done.
Thanks for stopping by today so I could share this with you. If you haven't seen the new A5 display folders or the stencils and page kits that were recently added to the Flutterby store, head over HERE to see whats new.
Til next time, happy scrapping!