Showing posts with label I heart you stencil. Show all posts

Wednesday, 10 July 2019

One of a Kind || Elisa Ablett


Hi Flutterby Fans,

Elisa here from the design team with my latest creation for you along with a step by step on how I created my background and tips on using the Art Foamies stamps.

Before we start the tutorial, lets take a quick look at some of the products I used to create with from the Flutterby Shop, a few bits and pieces from past kits as well.


So lets take a look at how I created the background - 


Using a palette knife, spread black gesso or thick black paint over the left and right hand sides of your background paper. Let it dry or heat dry.


Use a brayer and a craft mat to 'load' up your art foamies stamp, i find the paint goes on smoother and you get a better print. This is also a great way to add more than one colour at once!


Dry each layer and each colour before you add your next lot of stamping. Add a lighter contrasting colour over the top and then bring that out onto your background paper as well. 
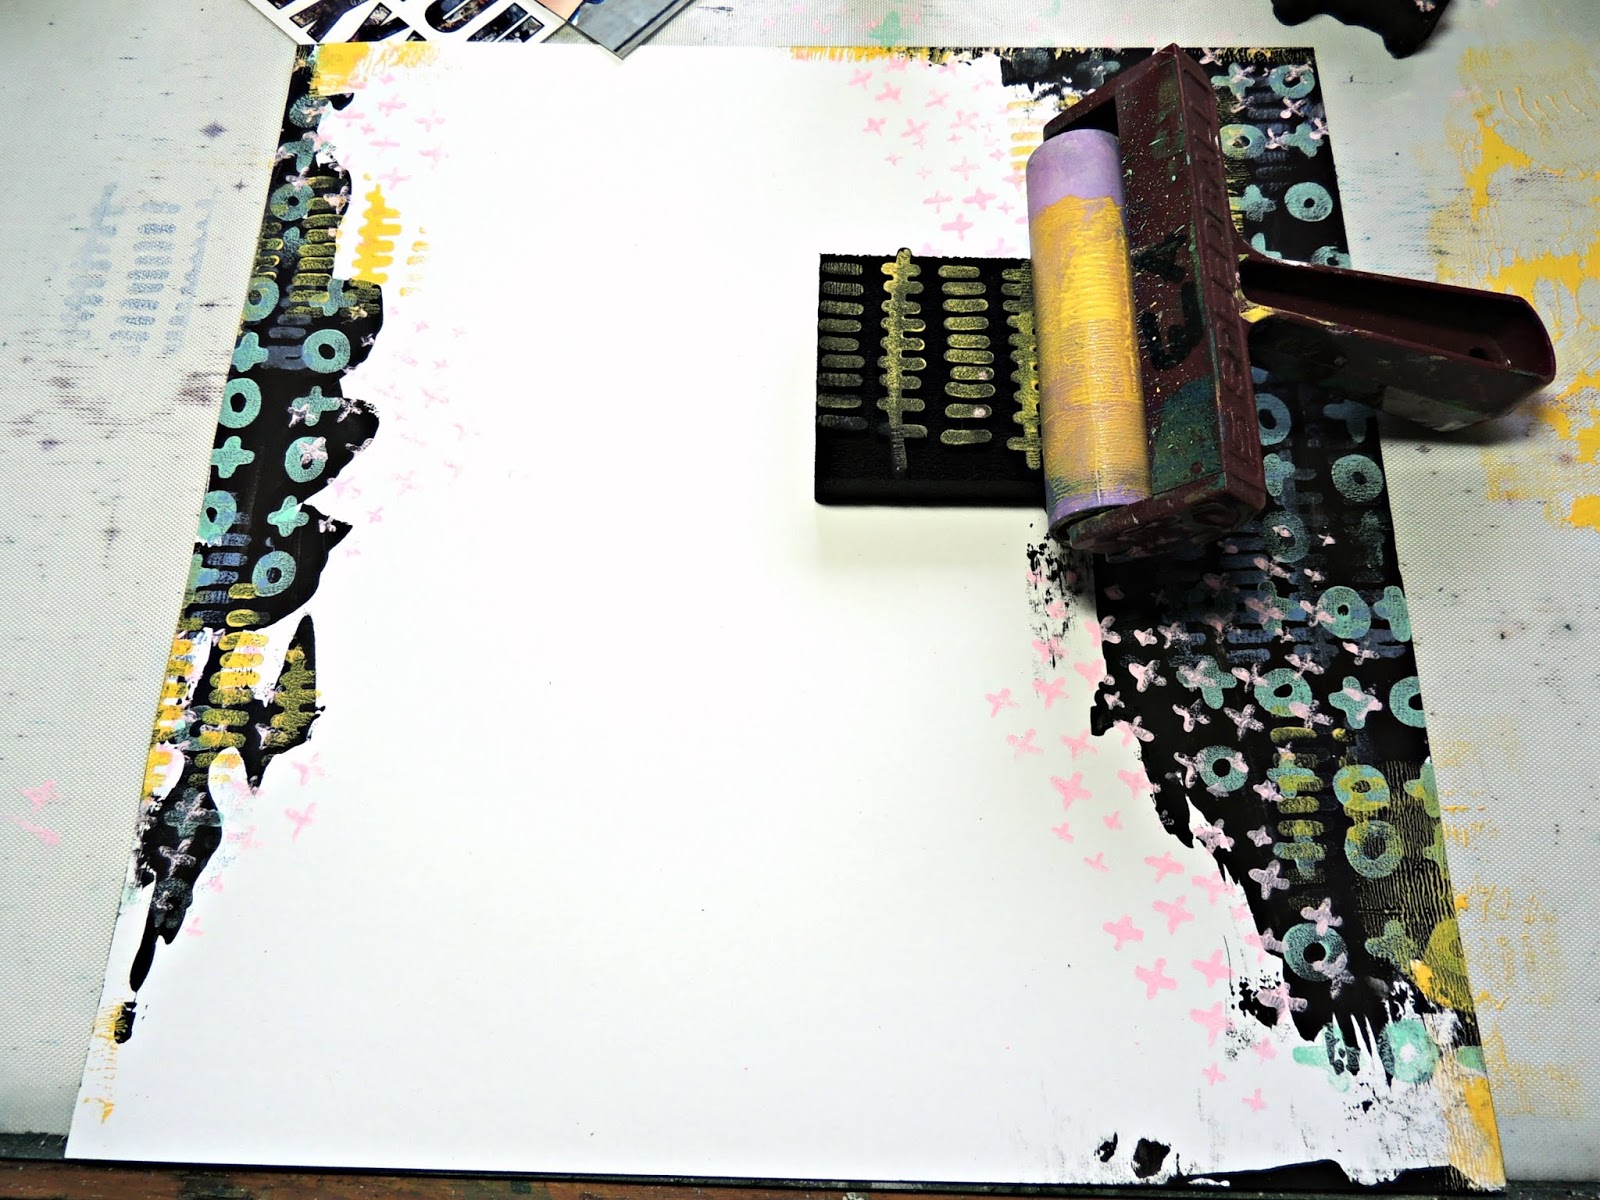

I only wanted to add a small amount of yellow to the page so I only added colour to a small portion of the stamp and also used my 'clean' palette knife to spread it along the edges of my paper a bit as well.


Add some cool white stripes to your page using the edge of your ruler. Add white paint to your craft messy mat, spread it out using a palette knife and then dip your ruler into the white and 'stamp' onto your page, keep stamping until you have the lines and effect you want.


Add smears or splatters of white paint to your page using your finger, and splatters with a fan brush.
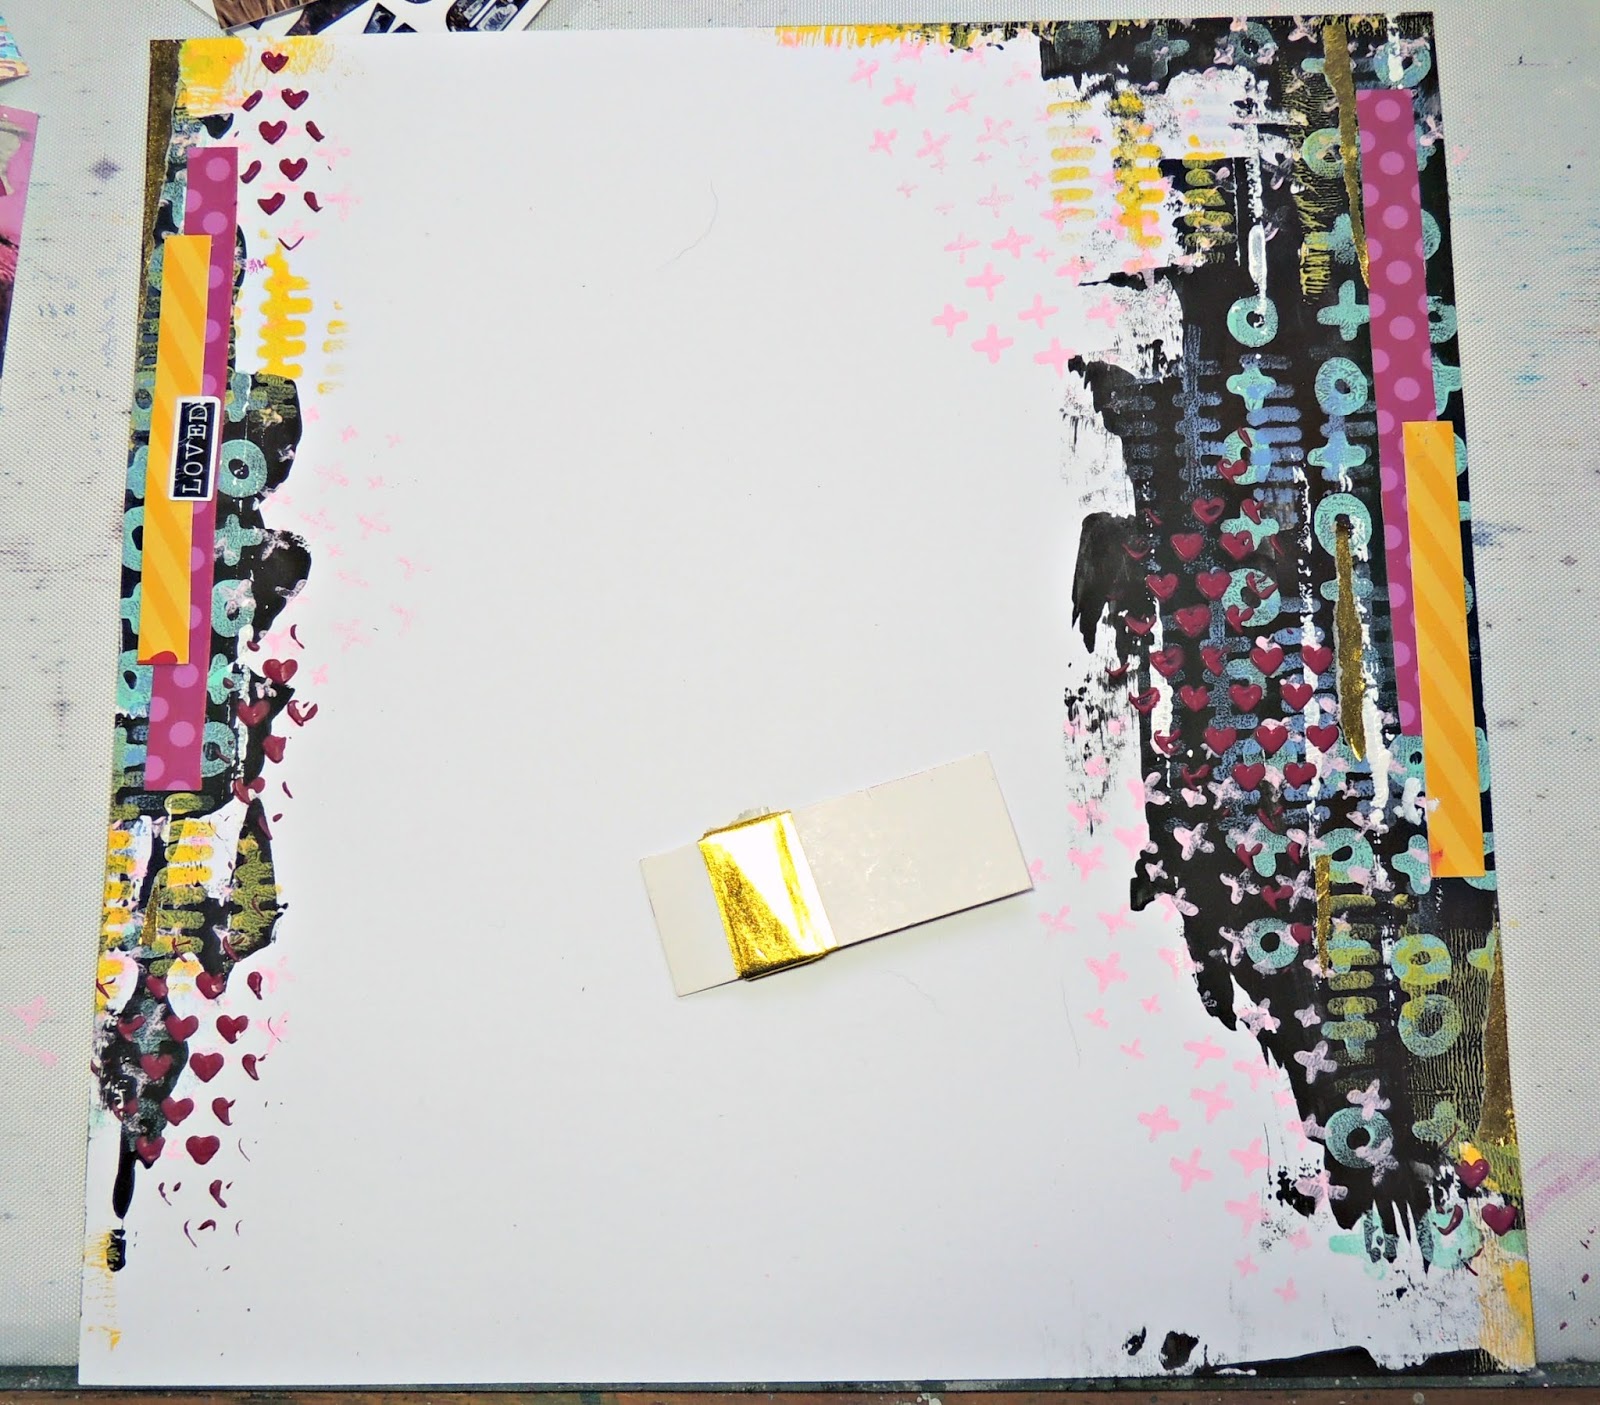


Using the palette knife again, spread pink paint through the Little Big Love Flutterby Stencil as shown in the photo above. The let dry before you add anything else. Once dry, tear strips of gold washi tape from a past kit and add to your background then stick your desired strips and stickers over the top.


Layer Filler Cards under your chosen photo, I chose bright and funky filler cards to match my background.


Stick down your photo cluster and then add your title ! I outlined my photo in black pen to make it stand out a bit more. 

Here are some close ups :-) 


I hope to see your creations using my background technique.

Thanks for stopping by the blog today, make sure you leave me some love!

Hugs

Elisa x


Monday, 18 March 2019

Sparkle & Shine & Always be kind | Tamara Buckler

Hello my wonderful scrappy friends,

I'm so excited to share my latest layout with you featuring the FABULOUS Magical AF collection! I think I've said it before, but I swear Anita created this layout just for me!

This week I've used the amazing 12x12 'Fabulous' paper from the Paper Pack. I trimmed about a centimetre from each side, and adhered it to a piece of white cardstock, adding some messy machine stitching around the edge, and ruffling up the paper.


I added some white gesso to the centre of my page to give a bit of separation for my photo and embellishments from the background. I also added some texture paste through a 'I Heart You' stencil. While this dried, I backed the body of the Unicorn Cut File included in the Kit with the 'Secret Garden' 12x12 paper and then backed the mane with a paper from the Everyday Etc Filler Cards


I matted my photo on some white cardstock, and then layered up some Everyday Etc Cards and foam tape behind this to matt the photo and add dimension. I used three elements from the Die Cuts pack to create my title, starting with 'sparkle' and 'shine' above my photo. Behind this I tucked a rainbow from the sticker sheets, as well as a gem and puffy glitter heart.


The Unicorn Cut File nestled perfectly around the bottom right corner of my photo cluster, and I was then able to tuck lots of extra bits around it. I completed my title by adding the 'Always be kind' Die Cut to the bottom left, and another puffy glitter heart.


I tucked another rainbow behind the unicorn, as well as little cloud from the sticker sheet. I also added a Flair Button, a gem and another puffy glitter heart.


To finish the page off I added some Gold Splatters across the page and over my photo.


Thanks for stopping by today and checking out my page. Make sure you jump over to the shop and pick up one of the Magical AF kits, I hear there are a few left, and they are such amazing value for money!!

Big Loves,
Tam xo


Thursday, 18 October 2018

Boring Together | Allara Bamforth

Happy Thursday!

I'm back on the blog today with a layout that turned out more an like an art journal piece using the fabulous 'Happily Ever After Collection'. I rarely plan anything I do, I kinda just go with it and see what happens, sometimes it works and sometimes its blah but you can never go wrong with bright colours I say.

I love just slapping paint on the backgrouds and making them my own. So with this piece I've added Flutter Colour Paint in a cascading rainbow effect and used my brayer to smoosh them across the page.

Using the I Heart You Stencil and the Half tone stencil, I have added some detail on the background with the paint and used my posca pens to add a few bits and bobs.

Using the Everyday Etc Filler Cards and some quotes from Everyday Etc Cards from the Happily Ever After Collection, I've matted up the gorgeous Tim Holtz paper dolls and added the 'Let's Be Boring together' title. To this I've added some stickers from the Happily Ever After Sticky Quotes and i've embossed a wood veneer from Happily Ever After Wood Veneer Bits.

Well that's it from me. Thanks for taking a peek.

Till next post,


Wednesday, 20 September 2017

Youer than you | Tamara Buckler


Hi All,

Tamara here again to share with you a layout I created that is a little different to my norm.


My little miss is obsessed with Dr Suess, I'm pretty sure she knows it word for word, so it was really fun to put this together this layout with the focus on that title, its one of my favourite Dr Suess quotes.


I have used a mixture of very watered down Flutterby paints as well as some others to create this background, I was going for a bit of a tie dye look. I then added some stamps and stencils for added interest, including some Colour Blast texture paste through the well loved and well used 'I Heart you' stencil.


I also mixed in some Sunshine Yellow Flutterby paint into some texture paste for the little dots you can see here.


The layout was finished off by matting my photo with some Everyday etc cards, and that was pretty much it!

Not a very product heavy page (sorry boss lady!) but I think it has a lot of impact and vibrancy because of the beautiful paint and the giant title!

Thanks for stopping by to check out my layout!

Big Loves,
Tam x


Wednesday, 6 September 2017

Rock Chick I Tamara Buckler

Hey Hey Scrappy Friends,

Happy hump day to you all!! I'm back again today to share another layout, this time showing off some grungy rock chick style!


I started this layout with some Kraft Cardstock and then got messy with some gesso on the background. I then ran some Whipped Spackle through the amazing new 'Flawsome' Stencil, and then used the packaging technique to add some Red ink spray for some colour. I than added some black ink to the Whipped Spackle and passed that through the 'I Heart You' Stencil, and finished the background off with lots of red and black ink splatters.

I then set about adding my paper layers behind my photo with 'Xtreme Teen' and 'Happy Together' Everyday Etc Filler Cards. I used a couple of fun pieces from Charms Creations, and then layered some more Flutterby goodies over the top, including this awesome wood veneer piece from 'Xtreme Teen'.


My title features the 'Rock' Die Cut from the Xtreme Teen collection, I also tucked some of these down the left side of my photo cluster for added interest. I also added some of the new white sticky quotes to the top left corner for a little added attitude.


I love all the textured grungy goodness on this page, and hope you do too!

Thanks for stopping by.

Big Loves,
Tam xo

Thursday, 24 August 2017

Embrace your flaws | Tamara Buckler

Hey Hey, Flutterby Peeps,

I'm back again today to share with you another layout that I created with the awesome Flawsome range!

I'm loving that there is a softer, more pastel side to this range. My amazing team mate Belinda Spencer has been showing this so amazingly in her last few layouts (check it out here & here!). So I've stepped over to the softer side and given it a crack!


I've mixed up some of FlutterColour Paint in Raspberry Punch, Aquamarine Dream, and Sunshine Yellow with some Whipped Spackle to make the beautiful pastel colours that I have run through the always fabulous 'I Heart You' stencil. I then layered up some strips of the Flawsome Everyday etc Filler Cards, as well as matted my photo, to create some beautiful pastel layers behind my pic.


To create this title I fussy cut the sentiment from one of the Flawsome Everyday etc Photo Cards, and popped it up on some foam dots for extra impact.


With so much texture and pretty colour going on, I didn't need to do much to embellish the page. I bought in some of the Flawsome Wood Veneers, Page Tabs, and a Mad About You Flair Button. And then finished things off with some White Tiny Sticky Quotes, and some beautiful enamel dots. Too easy!

Thanks for stopping by to check us out, and I hope you have lots of scrappy good time planned for this weekend!

Big Loves,
Tam x