Showing posts with label Photo Cards. Show all posts

Sunday, 21 October 2018

Stay Wild | Belinda Spencer

Hello Flutterby peeps!

Belinda here today to share another layout for October featuring a lovely mix of past products.

NOTE: This layout contains sentence enhancers. Look away if you are offended by swear words

'Stay Wild'


I decided to stick to a pink and orange yellow colour combination for this layout so I started by applying some Raspberry Punch and Arctic White Flutter Colour Paint to my background cardstock using a palette knife. Once that was dry I mixed some Orange Goldfish paint with texture paste and applied over the Shake Your Tail Feather Stencil. I diluted a little of the Raspberry Punch and Orange Goldfish paints with water and splattered them over the background too. I left to dry for a while before I got too impatient and finished off with the heat gun.


I mixed and matched filler cards from different collections but mostly from the Wild Bohemian range. This is one of my all-time favourite Flutterby ranges and the good news is you can still find some available in the store AND it is on sale!! The 'wild' kind of suits the photo of my darling daughter when she was much, much younger and the queen of tanties! (She was actually putting it on for the camera in this shot. She wasn't quite that feral for real thank goodness!)

I love tucking in a fresh white fussy cut to break up all of the colour from the various filler cards too.


I added a mix of quotes from a couple of Snippet Strips as well as some Page Tabs which are one of my favourite Flutterby embellishments.


I cut the 'wild' word for the title from a Wild Bohemian Photo Card and added some Thickers from my stash to finish.


Finally I added a sprinkling of Confetti Circles and Enamel Dots as well as a flair button.

I hope you are having a lovely scrappy Sunday using your own Flutterby stash.

Thanks for stopping by.

Cheers
Belinda

Monday, 3 September 2018

Together | Belinda Spencer

Hello Flutterby peeps!!

Welcome to my first post for September!

Today I have another layout to share with you featuring the fabulous Happily Ever After collection.

'Together'


I have used the super pretty Sporadic Romantic 12 x 12 patterned paper for my background and enhanced it with some lovely Flutter Colour Paint in Green Limousine and Tropicana Teal.


I spritzed quite a bit of water onto my layout and then dropped diluted paint onto the surface to allow it to spread. 


Once dry, I used the awesome BRAND NEW Cool as a Cucumber Stencil with some texture paste to add some more interest to the background. I chose some random words to highlight with a white paint pen.


I added a whole bunch of layers under my photo using off cuts of the other patterned papers in the range as well as Everyday Etc Filler Cards.


I love to add some fitting quotes using the Sticky Quick Quotes and the colours in the Tiny Rainbow quotes are perfect to co-ordinate with this range. I stuck the quotes down on white cardstock first for added strength and to give a nice little white border.


A sweet sprinkling of enamel dots never goes astray! They are the perfect little element to add detail to your page.


My layouts are never complete without the addition of page tabs either!


The wodd veneer title and the 'mine' comes from the Happily Ever After Wood Veneer Bits. These wood veneer sheets are so awesome and economical too!! I have used them on 8 layouts so far and still have some left!!


Here's what I used:

- 12 x 12 Sporadic Romantic
- 12 x 12 Drunk on Love
- 12 x 12 Blanket Thief
- Wood Veneer Bits


Thanks so much for stopping by the blog today to check out my layout. 

Cheers
Belinda


Tuesday, 28 August 2018

She Stood in the Storm by Allara Bamforth

Happy Tuesday!

I'm back on the blog today with a stash busting layout using lots of pretty pastel colours! Although I scrapbook to preserve memories of my beautiful family, I also tend to produce layouts that kind of reflect life decisions that are currently happening in my life. This layout happened to turn into one of those moments where the creative process helped me make some important career decisions which presented themselves last week!

For this layout I've used the beautiful 'Sporadic Romantic' 12x12 paper from the Happily Ever After Collection and cut an angled shape for the left hand side of my page and then cut out some of the gorgeous flower designs from the page to mount underneath my photo stack. Then using three matching colours of oxide inks, I've splattered these over the white cardstock base and the cut out pieces.


Using one of the quotes 'She stood in the storm', that I based the page on from the We Run the World collection Everday Etc Cards , I've stacked it with  more Every day etc Filler cards mostly from We Run the World but some offcuts from some of the other fab collections. I then tucked in some muslin in behind the photos stack to add some softness and texture.

To the top left of the photo stack I've added a photo tab from the We Run the World collection.  Then to the top of the quote I've added a couple of 'White' Tiny Sticky quotes and then the 'Always' die cuts from the 'Mad about You' collection. To the right of the quote I've added an oldie but goodie Flair Button from the amazing collection of Flair Buttons which are on the website (if you haven't checked out the full collection for a while - you really should!).

Q
And there we have the finished layout. Not a lot of mixed media this time around, as I really wanted the beautiful paper and important message to shine.

Thanks for taking a peek.

Till next post,

Allara xx 

Wednesday, 27 June 2018

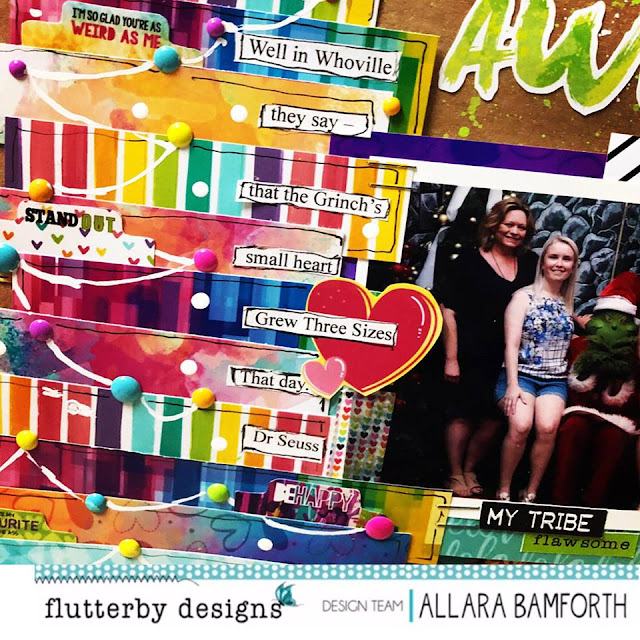
The Grinch's Small Heart Grew 3 Sizes That Day by Allara Bamforth

Happy Hump Day,

I'm back on the blog today with something a little different today and given that is only 6 months till Xmas and we are celebrating Xmas in July at Flutterby's camp - why not do a Xmas theme layout of my favourite character - The Grinch. We couldn't miss the opportunity last Xmas to get our Santa photo done with the Grinch.

Although I've mostly used 'Happily Ever Collection' in this layout, I've used bits and pieces from a few previous collections because they just all mix and match together so well!!


The tree is made up of strips and offcuts from the Happily Ever After Everyday Etc Filler Cards as well as the star on top. In between the strips, I've added various Photo Tabs from Happily Ever After and Flawsome collection. Also on the tree I've added some Enamel Dots - Neon to look like baubles.


The background is splattered with paint from the Flutterby Colur Paint - Bright Set, Artic White and Green Limousine. The photo is matted with more of the Happily Ever Collection Filler Cards and I've tucked a couple of Washi Tape pieces from the full Happily Ever After Kit.

Finished it off with a Flair Button from Happily Ever After Set 1 and a wood veneer snuck in from the Good Vibes Only - Wood Veneer Bits. The title is a die cut from the Mad About You collection and I've also added some stickers from the Blackboard Sticky Quotes and Flawsome Sticky Quotes.

Thanks for tuning and checking out this weeks blog post. Only 4 more weeks till the Flutterby Create by the Lake Camp - I'm so excited!!

Till next post,

Allara xx


Wednesday, 20 June 2018

Important | Belinda Spencer

Hello Flutterby peeps!!

Belinda here today to share another layout featuring the fabulous Happily Ever After collection.

'Important'


How cool is that background paper?!! That is the 'Mac & Cheese' 12 x 12 patterned paper in the range and I LOVE it. I really wanted to showcase that paper on my layout and therefore for a complete change I have not added any mixed media to my background. It makes a really bold statement just as it is and looks really cool combined with the kraft and black and white elements.


I cut a strip from the 'Boring Together' patterned paper to layer on top of the background paper and doodled a loose border around it with a black journaling pen.


I layered some Everyday Etc Filler Cards and added those to the layout followed by the 'important' Snap 2 Fussy Cut.Next I added my photo and slipped the bottom edge of it under the letters. I added a cool quote cut from the 'What Makes Us Work' patterned paper.


I also added a die cut, page tabs, washi tape, wood veneer bits and a cool flair button.


HAPPILY EVER AFTER:
- Washi Tape

Snap 2 Fussy Cuts
Page Tabs
Flair Button


Monday, 4 June 2018

Weird | Belinda Spencer

Hi Flutterby peeps!

Belinda here today to share a layout featuring the brand new Happily Ever After collection.

I think my favourite thing about this stunning range is the 12x12 patterned paper pack. The designs are so fabulous and bright and you can get away with very little altering as Anita has done all the hard work for you. 

For my layout today I have not added any mixed media. SHOCK HORROR!! Seriously the paper is so gorgeous as is that it just doesn't need it. Check this out...

'Weird' Layout


For my background featuring the 'Love Potion' patterned paper, I fussy cut some of the love hearts to make cute peep holes in the paper. I then layered it on some white cardstock and used a black journalling pen to doodle in some messy hearts. 

Here's a closer look...

I added some layers with co-ordinating filler cards and used my journalling pen to add borders. I used a white paint pen to flick some white droplets across the page and let dry.


I added a photo of my hubby and me being strange. In actual fact it was a cold day and we both had cold noses so we pulled our jumpers up to cover our noses. I thought my hubby looked like Count Dracula so this was our impression of vampires. Yeah you had to be there. LOL


I finished with some cute wood veneer bits, a die-cut, page tab and some enamel dots.
Done!
Sometimes it is nice to take a break from the mixed media and create a quick layout and this collection makes it super easy to do so.

Here's what I used:


Thanks for stopping by the blog today!

Cheers
Belinda

Monday, 28 May 2018

You are the Stars by Allara Bamforth

Good Morning and Hello Again,

Back on the blog today and I have a bright lovely layout to colour up your Monday using the 'Happily Ever After' collection!


This is entirely created background with Flutterby Colour Paints and Stencils.  I have used the four colours Grape Soda, Tropical Teal, Raspberry Punch and Sunshine Yellow from the Flutter Colur Paint - Bright set and rolled them over mypage with a small brayer. I mostly painted in a horizontal direction as I didn't want the paint to mix toghether to much and then carefully cleaned off my brayer and then going over the top vertically just to get a small hint of th colour. I then used a small amount of Artic White haphazardly.

I next used the Words of Wisdom stencil and dabbed through some Artic White with a sponge. I didn't really want the words to show but used it more as texture/interest for the background, I also turned it over in a couple of spots to clean off the paint. I then used the Stargazed stencil with some black ink, I just wanted used this as background interest again and then used a posca pen to outline some of the stars.


Using Artic White I splattered it all over the page. For the rest of the back ground detail I have used a Square Stich Stamp which I have also stamped on the background of the Everyday Etc Filler Cards for matting. I then used one of my nesting star dies and using Black Mayhem in my Fineline Applicator traced around these dies for the background detail.

I've matted my photo with Happily Ever After Everyday Etc Filler Cards and the Happily Ever After Frame 51. The title 'You are the Sun, The Moon, The stars and all that other good shit' is from the Happily Ever After Everday Etc Photo Cards, and the 'Love' acrylic title and the Lips Washi tape is from the Happily Ever After May Kit 2018. To finish off a couple of Heart Stickers from the Happily Ever After Sticky quotes and some Neon Enamel Dots.

Last but not least I had some left over pieces from die cuts laying around that I thought would make a great sun. So using my aquapastels coloured those in to add behind the photo and also to add little depth to my big stars on the page.

Hope you enjoy your week and make sure you order some of the fabulous Happily Ever After collection by clicking on the links above.

Till next post,

Allara xx


Saturday, 19 May 2018

Life Together | Belinda Spencer

Hello!

Belinda here today to share a layout featuring the BRAND NEW Happily Ever After collection.

This is such a fun collection and as I was searching for (embarassing) photos of my hubby and myself I realized that we just don't have enough photos of us together. I need to rectify that!

I did manage to find one of us together where I appear relatively normal but my hubby is pulling the weirdest face for some reason. It's probably because he hates being in photos so when I force him to he gets his revenge by messing them up. Little does he know these are the ones I love the best and I WILL scrap them for all to see. Revenge huh? He is an amateur. LOL

'Life Together'


I had so much fun experimenting with a beautiful rainbow of Flutter Colour paint on my background. I spritzed my cardstock quite heavily with water (yes it warps the paper but I can live with that) and also diluted the paints with water in a paint palette. I then used a soft wet paintbrush to drop the colours onto the page. If you have enough water on the page the paint will just bleed out and do its own thing. I love that. You can of course encourage it where to go using the paintbrush.


Aren't those paints just the prettiest colours? Even better they co-ordinate so perfectly with the Happily Ever After collection.

Next I had to add some stencilling with the fabulous new stencil 'All You Need Is Love'. I used white gesso for a soft look.


Then I layered up a fussy cut and the gorgeous 'Blanket Thief patterned paper from the paper pack as well as page tabs, filler cards, enamel dots and my title. I cut the 'Life' from a photo card and the little grey and white hearts from a filler photo card.


Products used:

* Green Limousine
* Raspberry Punch
* Sunshine Yellow
* Tropicana Teal

Well that's all from me today. Make sure you head over to the store HERE to grab this gorgeous collection for yourself.

Thanks for stopping by the blog today.
Belinda

Sunday, 13 May 2018

Project Life with Adele *NEW HAPPILY EVER AFTER COLLECTION!*

Hello lovelies!!

I am so excited to begin working with the fab new collection "Happily Ever After" and dived in immediately to work on some of my Project Life pages.

I used lots of the stickers this week to act as journaling on my pocket cards. The tiny word stickers come in handy when you just want to add a tiny little detail to a photo. 

I used some of the enamel dots and an Everyday Etc card to create a simple filler card with a tiny bit of journaling. There's so many colour choices in the Everyday Etc cards and filler cards so it's easy to find a card that will coordinate with your photos for each week. I decided to keep this particular one quite neutral and added brighter cards to the top and bottom rows instead. 

I really enjoy adding the page tabs behind my photos, especially with very busy photos or photos that don't have a lot of blank space (like the one below of Archie's GIANT head hehe!). 

I hope you enjoy this little Project Life page, I will be back in a couple of weeks with my first layout and process video using the "Happily Ever After" collection. Have you started using the collection yet??

Adele :)