Happy Wednesday!
I'm back on the blog today with a stash busting layout using some of my favourite Flutterby Designs bits and pieces with a bright and colourful layout.
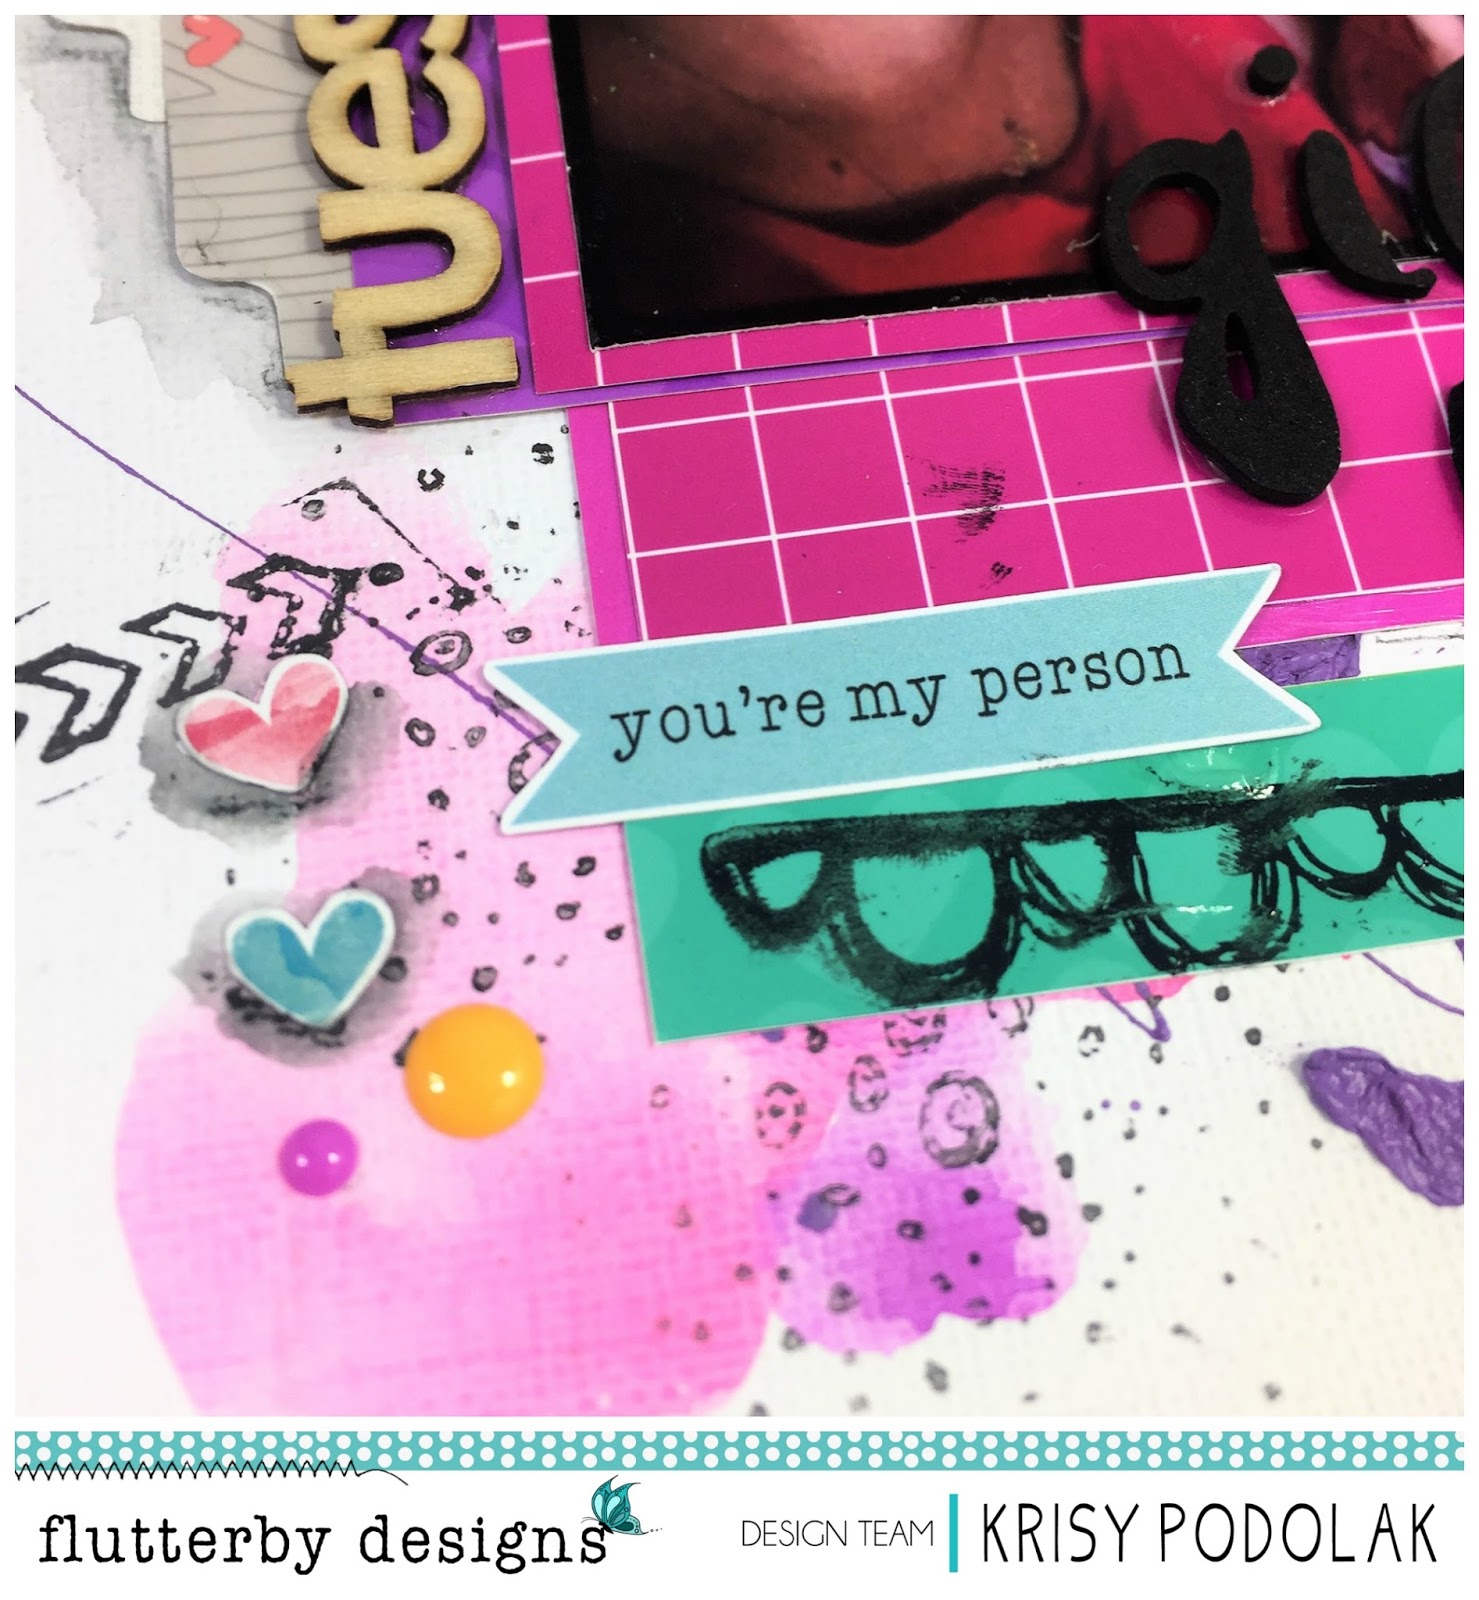
The background was created with some of my favourite Flutter Colour Designs paint from the Brights set which I've used my brayer to paint across half of my background on the right and then just some of the excess on the left. Subtly I've stamped some of the Art Foamies Fill It In stamps and also some of the Edgies beside my photo. I've splattered some white paint over my background to match some of the design in the title.
I used Everyday Etc Cards to layer my photo and chose a matching title. I added a Page tab and some Die Cut Bits and Bobs to the top right and bottom right of the photo. To the bottom right I added a Flair Button and to the bottom left I used a wood veneer piece that I painted in matching colours.
To the top left and bottom right I added some Sticky Quotes and finished off using some heart stickers.
Although everything I used was from different collections, I was able to find so many mix and match pieces to create something colourful!!
Thanks for taking a peek!
Till next post,
Showing posts with label heart stickers. Show all posts
Wednesday, 6 November 2019
Wednesday, 18 April 2018
Beach Vibes | Sue Plumb
Hi everyone!
Sue Plumb here to share my latest design team project with you featuring the awesome 'Good Vibes Only' collection that was recently released.
We have been enjoying the last remnants of summer here in Qld this week, so I thought it was only fitting to go back and scrap some of my fave summer photos of my kids.
I started this page by laying down some watercolour for my background. I used Colour Blast Colour Shimmer Sprays in blue and gold, which I applied using the packaging technique. I then added some stamping over the top using grey ink and a crackle effect stamp from Viva Las VegaStamps. I also added some tiny splatters of orange ink to bring a little warmth and contrast.
Once my background was dry, it was time to add some papery layers. I used a variety of the 'Good Vibes Only' Everyday Etc filler cards, which I cut into various sized pieces and layered together to form a mat for my photos. I also added a page tab (from the Kraft Notes 5 sheet); torn pieces of washi tape (which comes in the 'Good Vibes Only' Kit); snippets of white punchinella and some frayed gauze; before adding my photos on top.
To create my title, I used several pieces from the 'Good Vibes Only' Wood Veneer Bits pack, as well as a white Tiny Sticky Quote.
I added the wild barefoot & free sticker from the 'Good Vibes Only' Sticky Quote sheet directly to my photo, using some foam tape to pop it up a bit. Underneath the edge of my photo, I added a DIY heart from Charms Creations, topped with a starfish from the wood veneer bits pack.
To balance out my design, I added a wood veneer pineapple and another small starfish to the left side of my photos. I also added another couple of white Tiny Sticky Quotes to my page.
I started this page by laying down some watercolour for my background. I used Colour Blast Colour Shimmer Sprays in blue and gold, which I applied using the packaging technique. I then added some stamping over the top using grey ink and a crackle effect stamp from Viva Las VegaStamps. I also added some tiny splatters of orange ink to bring a little warmth and contrast.
Once my background was dry, it was time to add some papery layers. I used a variety of the 'Good Vibes Only' Everyday Etc filler cards, which I cut into various sized pieces and layered together to form a mat for my photos. I also added a page tab (from the Kraft Notes 5 sheet); torn pieces of washi tape (which comes in the 'Good Vibes Only' Kit); snippets of white punchinella and some frayed gauze; before adding my photos on top.
To create my title, I used several pieces from the 'Good Vibes Only' Wood Veneer Bits pack, as well as a white Tiny Sticky Quote.
I added the wild barefoot & free sticker from the 'Good Vibes Only' Sticky Quote sheet directly to my photo, using some foam tape to pop it up a bit. Underneath the edge of my photo, I added a DIY heart from Charms Creations, topped with a starfish from the wood veneer bits pack.
To balance out my design, I added a wood veneer pineapple and another small starfish to the left side of my photos. I also added another couple of white Tiny Sticky Quotes to my page.
To finish off my page, I decided it need more teal colour brought into it; so I used a Colour Blast Colour Shimmer Cube to add some areas of colour, as well as some extra splatters around the page.
I then added a few small teal coloured hearts from the Rainbow Heart sticker sheet; stamped a couple of phrases and the date and I was done.
Thanks for stopping by so I could share this with you. If you haven't got your hands on the 'Good Vibes Only' collection yet, or checked out the other recent items in the store (including stencils and stickers), then click HERE to see them all.
Monday, 20 March 2017
Adventure + OH Neigh | Krisy Podolak
Krisy back again today to share two layouts that pushed the boundaries on the new "Fur-ever Friends" Collection. I went back and looked through thousands of photos to see which ones had animals in them. We don't have any pets so I had to find alternatives.
This is what I came up with. The first layout is of my daughters first visit to Lone Pine Koala Sanctuary. Lone Pine is a small animal sanctuary in the heart of Brisbane. It is a great place to take kids at is is not too big and you can get a yearly pass fairly cheap. That means that you can justify going there and only spending an hour or two at a time makes it easy to tire the kids out and you still have enough money left over for new Scrappy supplies you have been eyeing off in the Flutterby Shop.
I will apologise now for the low light of my photos. It seems when we have really hot bright days, I cannot photograph layouts. Stained glass windows look great but are a bitch to work with. The light just doesn't work and outside is not an option as our house is painted blue and this really kills any natural light.
Here is my first layout.
Now on to my next layout. Another series of photos that I found was this of my first Melbourne Cup as a mother. I loved Melbourne Cup before kids not that I ever really put on a bet. But I love fascinators and the excitement. This is my first time going to a Luncheon and it was great fun.
I cut up the Oh Neigh card from the "Fur-ever Friends" Everyday Etc Cards and teamed it up with other cards from my whole Flutterby stash that worked with the colours of the photo. I then added some Photo tabs, enamel dots and heart stickers.
Well, I hope I have inspired you to use your cards a bit differently. Please share what you create on the Flutterby Inspiration HQ page. I'd love to see them.
Krisy xx
Wednesday, 1 March 2017
Welcome to our Tribe | Sue Plumb
Hi everyone!
Sue here with you today to share my latest layout using some of the new 'Fur-ever Friends' collection. Pets are such an important part of the family, that they deserve their own pages in our albums too. This collection is perfect for capturing those memories of all those furry, feathered (or even scaly) members of the family.
The layout I have to share today features a photo of the newest member of our family when we arrived home from picking him up. (He was so relaxed, and already showing us what a chilled out little man he is.)
I decided to mix it up a bit for this layout; and along with the elements from the 'Fur-ever Friends' collection, I also threw in some pieces from previous releases.
I started my page with a sheet of patterned paper, and drizzled some 'Tropicana Teal' Flutter Colour paint (from the new release bright set) onto the page and set it aside to dry.
Sue here with you today to share my latest layout using some of the new 'Fur-ever Friends' collection. Pets are such an important part of the family, that they deserve their own pages in our albums too. This collection is perfect for capturing those memories of all those furry, feathered (or even scaly) members of the family.
The layout I have to share today features a photo of the newest member of our family when we arrived home from picking him up. (He was so relaxed, and already showing us what a chilled out little man he is.)
I decided to mix it up a bit for this layout; and along with the elements from the 'Fur-ever Friends' collection, I also threw in some pieces from previous releases.
I started my page with a sheet of patterned paper, and drizzled some 'Tropicana Teal' Flutter Colour paint (from the new release bright set) onto the page and set it aside to dry.
I created a layered photo mat by combining Everyday Etc filler cards from the 'Fur-ever Friends' and 'Happy Together' collections. I also tucked one of the 'Fur-ever Friends' Page Tabs in amongst my layers; and used another filler card from the same collection to add two triangular pieces to the diagonally opposite corners. The "meow" word came from the 'Fur-ever Friends' Die Cut Bits & Bobs pack.
The gorgeous "a house is not a home without a pet" quote and the cute little house were both fussy cut from one of the 'Fur-ever Friends' Everyday Etc cards. You can also see where I tucked in some messy thread for texture.
I also tucked some matching thread on the other side of my photo, which I topped with a cute camera flair button (from set #195). Alongside that, I added a Photo Cut Out tab (from the Bright Directions Tabs 3 sheet); and an enamel dot (from the Bold set).
The title for my layout was fussy cut from one of the 'Happy Together' Everyday Etc cards. As a finishing touch to tie in with the hearts on the paper I had used, I added some Rainbow Heart stickers randomly around my page.
Thanks for stopping by today so I could share this page with you. If you have been creating with Flutterby goodies, make sure you share your projects with us in the Flutterby Inspiration HQ group on Facebook. (Or just stop by and say hello; ask the team a question; or see what others have been sharing.)
Til next time, happy scrapping! X
Thanks for stopping by today so I could share this page with you. If you have been creating with Flutterby goodies, make sure you share your projects with us in the Flutterby Inspiration HQ group on Facebook. (Or just stop by and say hello; ask the team a question; or see what others have been sharing.)
Til next time, happy scrapping! X
Friday, 17 February 2017
Spencer & The Crazy Cat Lady | Krisy Podolak
Hi-Ho Flutterby Lovelies.
Krisy back today to share a layout featuring the new "Fur-Ever" friends collection. I will be honest when I saw this collection my heart sank. Just a bit. The reason was because we don't have any pets. We used to have bulldog before we had kids with the intention of getting another but then we had kids. And you know kids are kinda like pets...aren't they?!? Just Kidding.
All that being said, within a week I had smashed out 8 layouts using this collection. Yes, I got a little creative with some of them but some I did manage to use for their right intention. Today, I am going to share two.
The first was the 8th layout I created from this collection. I had plans for a layout but then things changed on Saturday. This layout features my best friends cat, Spencer. I had planned to make a funny layout but then on Saturday, my BF Sarah, told me Spence was a little bit off and had to make a weekend visit to the vet. On Monday after a grim diagnosis Spencer was put to sleep. So I changed my funny layout to something Sarah could hang on her wall. I framed and delivered it before she got home from work.
I used a few different cards From the Everyday Etc cards to create the base and then fussy cut the words so they didn't take up too much space. I mounted the Purr-fect on some foam squares to add some dimension.
For the background I used the "You Spin Me Right Round" Stencil with some Colour Blast Colour Spray, then stamped over the top for a bit more visual interest.
Here are a few close ups...
As this layout isn't technically about real live cats, I took colour inspiration from the card that says "Crazy Cat Lady", teamed it up with this piece of paper from Kaisercraft, added some Colour Blast Heavy White Gesso to "dull" it down just a bit, added a splash of Colour Blast Shimmer Dust in Lollipop and then stamped over the top. For more texture and "mess" I added some Flutter Paint swirls over the top. I just used the Pink and Orange from the Original Rainbow set but the brights would have been awesome too. But OH MY GOD! How hard is it waiting for these to dry. This technique is not one I do very often. I am not a scrapper than can pre-prepare backgrounds, I like to start and finish one at a time and I didn't want to hit this one with the heat gun as I didn't want the paint to bubble. I wanted it to keep its' form. Thankfully it was another warm Queensland day, and it only took just over an hour (with a little help from the heat gun at the end).
Then I layered some random papers with the Pink paw card from the Everyday Etc Collection to form the matte behind my photo. To finish the layout I cut up the title card, added the Crazy die cut from the Mad About You collection along with a YOU flair button and some orange and yellow hearts. \
Here are a few close ups.
Krisy back today to share a layout featuring the new "Fur-Ever" friends collection. I will be honest when I saw this collection my heart sank. Just a bit. The reason was because we don't have any pets. We used to have bulldog before we had kids with the intention of getting another but then we had kids. And you know kids are kinda like pets...aren't they?!? Just Kidding.
All that being said, within a week I had smashed out 8 layouts using this collection. Yes, I got a little creative with some of them but some I did manage to use for their right intention. Today, I am going to share two.
The first was the 8th layout I created from this collection. I had plans for a layout but then things changed on Saturday. This layout features my best friends cat, Spencer. I had planned to make a funny layout but then on Saturday, my BF Sarah, told me Spence was a little bit off and had to make a weekend visit to the vet. On Monday after a grim diagnosis Spencer was put to sleep. So I changed my funny layout to something Sarah could hang on her wall. I framed and delivered it before she got home from work.
I used a few different cards From the Everyday Etc cards to create the base and then fussy cut the words so they didn't take up too much space. I mounted the Purr-fect on some foam squares to add some dimension.
For the background I used the "You Spin Me Right Round" Stencil with some Colour Blast Colour Spray, then stamped over the top for a bit more visual interest.
Here are a few close ups...
Sarah loved it.
Now here is another layout layout I did. I thought I would never manage to use the cat cards from this collection, then on a day last week when it was close to a MILLION degrees (Queensland summer temperature at 40 degrees celcius) my daughter decided the it was too hot for clothes but totally suitable for a cat beanie. She wouldn't wear the damn thing in winter and I have no idea where she got it from but Freaking Crazy is the only way to describe her.
Then I layered some random papers with the Pink paw card from the Everyday Etc Collection to form the matte behind my photo. To finish the layout I cut up the title card, added the Crazy die cut from the Mad About You collection along with a YOU flair button and some orange and yellow hearts. \
Here are a few close ups.
Thank you for stopping by today. I will be back next month with some more crazy layouts using the NEW "Fur-ever Friends" Collection.
Krisy xx
Monday, 2 January 2017
H & K | Sue Plumb
Hi Flutterby peeps! Happy New Year to you all! I am assuming that everyone is over their hangovers today and that the new year resolutions are still intact? Regardless of whether you had one or not, I hope that 2017 is a happy & prosperous one for all of us, whatever you hope to achieve.
Now the formalities are out of the way, onto my layout I have to share with you today. This one features a photo of my boys that I took recently as I dropped them off for daycare. No reason - a "just because" photo. (Sometimes those ones are the best, aren't they?)
I used the Mad About You collection for this page - proving that this range doesn't have to be just for those you are mad about, it can also be for the ones who drive you mad! ;)
I started by adding a bit of colour to a sheet of patterned paper using some Flutter Colour paints. (I applied simply by spreading them across my page with a palette knife.) Once dry, I added some Colour Blast Colour Paste through one of my Flutterby mini stencils on top of the paint, and then topped that off with a drizzle of pink Flutter Colour paint.
I adore this together Everyday Etc card - I have to admit I have been hoarding it until now because I loved it so much. I layered it on top of a hot pink Filler Card (which I also used part of behind my photo) to help pick up the pink from the heart on it.
Besides the Filler Card, you can also see I used part of a frame from the Mad About You Die Cut Bits & Bobs pack under my photo, which I topped with some messy thread and a gorgeous flair button. Above the photo, I added a Page Tab and the cute die cut geotag (also from the Bits & Bobs pack).
I embellished directly onto the photo using an offcut from a Filler Card, a sticker from the Mad About You Sticky Quick Quotes sheet, and a rainbow heart sticker.
I really wanted to use the & card as part of my title, so decided to fussy cut it out and then use another Filler Card to handcut the H and K from, which I attached with some tiny staples. On top of the ampersand I added a Tiny Sticky Quote and a die cut heart.
For the final part of my layout, I added a couple more of the Sticky Quick Quotes stickers, a tiny Sticky Quote and another die cut heart. I used a wood veneer circle (which I coloured white with a Posca pen) to highlight the you drive me crazy quote. After that, a few black splatters of mist and I was done!
Thanks for stopping by today so I could share this with you. A reminder that the Flutterby Designs store is currently closed for the Christmas / New Year break and will be back online on Wednesday the 11th January.
I will be back in a couple of weeks with another creation to share, but stay tuned, because the rest of the Flutterby DT (including our newest members) have plenty to coming up share with you! X
Now the formalities are out of the way, onto my layout I have to share with you today. This one features a photo of my boys that I took recently as I dropped them off for daycare. No reason - a "just because" photo. (Sometimes those ones are the best, aren't they?)
I used the Mad About You collection for this page - proving that this range doesn't have to be just for those you are mad about, it can also be for the ones who drive you mad! ;)
I started by adding a bit of colour to a sheet of patterned paper using some Flutter Colour paints. (I applied simply by spreading them across my page with a palette knife.) Once dry, I added some Colour Blast Colour Paste through one of my Flutterby mini stencils on top of the paint, and then topped that off with a drizzle of pink Flutter Colour paint.
I adore this together Everyday Etc card - I have to admit I have been hoarding it until now because I loved it so much. I layered it on top of a hot pink Filler Card (which I also used part of behind my photo) to help pick up the pink from the heart on it.
Besides the Filler Card, you can also see I used part of a frame from the Mad About You Die Cut Bits & Bobs pack under my photo, which I topped with some messy thread and a gorgeous flair button. Above the photo, I added a Page Tab and the cute die cut geotag (also from the Bits & Bobs pack).
I embellished directly onto the photo using an offcut from a Filler Card, a sticker from the Mad About You Sticky Quick Quotes sheet, and a rainbow heart sticker.
I really wanted to use the & card as part of my title, so decided to fussy cut it out and then use another Filler Card to handcut the H and K from, which I attached with some tiny staples. On top of the ampersand I added a Tiny Sticky Quote and a die cut heart.
For the final part of my layout, I added a couple more of the Sticky Quick Quotes stickers, a tiny Sticky Quote and another die cut heart. I used a wood veneer circle (which I coloured white with a Posca pen) to highlight the you drive me crazy quote. After that, a few black splatters of mist and I was done!
Thanks for stopping by today so I could share this with you. A reminder that the Flutterby Designs store is currently closed for the Christmas / New Year break and will be back online on Wednesday the 11th January.
I will be back in a couple of weeks with another creation to share, but stay tuned, because the rest of the Flutterby DT (including our newest members) have plenty to coming up share with you! X
Tuesday, 20 December 2016
Husbands | Krisy Podolak
Hi Flutterby Lovelies,
Krisy back today with my last share for this month and for
this design team term. I am sharing another layout using the NEW Mad about You
range and I designed it all around the card- “Husbands are like wine. They take
a long time to mature”. This layout
features my brother and his partner and the card suited them and this photo to
a T.
Here is my layout:
I used a pretty busy background piece of paper so to dull it
down a bit, I used some Flutterby Paint and an old rewards card to add a thin
layer of colour to build upon. Then I
used a few different cards from the range to build a paper layer behind the
photo. Finally, I finished off the
layout with a few die cut circles, a flair button and some stickers.
Here are some close ups.
There is a process video too, you can watch it here.
Thank you for another six months of awesome fun. Hopefully, Neet will keep me around for
another term. Now to wait and see.
Krisy xx
Tuesday, 8 November 2016
Everyday Life | Krisy Podolak
Hi, Can you believe it is almost Christmas?!? This layout is throwing back to Mother's Day just because that is how I work. There is no real order in what I do. I just make stuff when I feel like it.
This layout started off looking a lot different. It was pink and gold but then I didn't like it and changed it up a bit. I looked at the embellishments I wanted to use and decided to draw inspiration from that little grey flair button. So I drew some lines, pulled out my gelatos and changed up the whole colour scheme. You can still see a bit of the pink poking through but that it all part of the process right.
Once I had painted my background I layered everything else over the top starting with the placement of my photo and working around that.
This layout started off looking a lot different. It was pink and gold but then I didn't like it and changed it up a bit. I looked at the embellishments I wanted to use and decided to draw inspiration from that little grey flair button. So I drew some lines, pulled out my gelatos and changed up the whole colour scheme. You can still see a bit of the pink poking through but that it all part of the process right.
Once I had painted my background I layered everything else over the top starting with the placement of my photo and working around that.
I used a fussy cut "Everyday Life" from the Midnight range that I had used the border frame for another layout as my title and added some Tiny Word Snippets. I left the title white so it would stand out against the grey, gold (I {heart} you stencil) and mucky olive colour of the background.
This is the flair that was the inspiration behind the whole layout....I propped it up on a Charms Creations DIY heart that I altered in the same colours of the background to make the flair button really stand out.
Thursday, 22 September 2016
Sweetheart | Sue Plumb
Hi Flutterby peeps!
Sue Plumb here with you sharing my latest work for Flutterby Designs. Today I have a layout to share with you featuring a (fairly typical) photo of my partner and I. (Rarely can the man have a "normal" photo with me without some sort of silly face, but hey, that's him...and I love him anyway!)
For this layout I started with a sheet of patterned paper from Cocoa Vanilla Studio. I opted to use this dark grey, as I want it to help my colours "pop". On top of the patterned paper, I created a mat for my photo using a selection of Everyday Etc cards. (I love the variety of patterns and colours that can be found in the filler card packs, and I also love the fact that they are always exactly the right shades to coordinate with all my other Flutterby goodies!) I also added some Photo Cut out frames to my layers, for some extra visual interest and depth.
Once I had my base layers in place, I used the "I {heart} you" stencil from the Mini Stencil set and a white gel pen to add some doodled hearts to my background. I then proceeded to drizzle it all with some white Flutter Colour paint. This provided a good contrast to the structured, linear background I had already created.
Whilst my paint was drying, I added some embellishments directly onto my photo - the wood veneer sweetheart word and heart, which were coloured using my Posca pen; and the flair button (from set #249), which I nested on some messy cotton thread. I then fixed my photo in place and proceeded to embellish the rest of my layout.
Above my photo I added a couple of Page Tabs; and to the left of my photo I added a Photo Cut Out tab (from the "Bright Directions Tabs 3" sheet.) I also added some Snippet Strips and bold Enamel Dots around my page.
Sue Plumb here with you sharing my latest work for Flutterby Designs. Today I have a layout to share with you featuring a (fairly typical) photo of my partner and I. (Rarely can the man have a "normal" photo with me without some sort of silly face, but hey, that's him...and I love him anyway!)
For this layout I started with a sheet of patterned paper from Cocoa Vanilla Studio. I opted to use this dark grey, as I want it to help my colours "pop". On top of the patterned paper, I created a mat for my photo using a selection of Everyday Etc cards. (I love the variety of patterns and colours that can be found in the filler card packs, and I also love the fact that they are always exactly the right shades to coordinate with all my other Flutterby goodies!) I also added some Photo Cut out frames to my layers, for some extra visual interest and depth.
Once I had my base layers in place, I used the "I {heart} you" stencil from the Mini Stencil set and a white gel pen to add some doodled hearts to my background. I then proceeded to drizzle it all with some white Flutter Colour paint. This provided a good contrast to the structured, linear background I had already created.
Whilst my paint was drying, I added some embellishments directly onto my photo - the wood veneer sweetheart word and heart, which were coloured using my Posca pen; and the flair button (from set #249), which I nested on some messy cotton thread. I then fixed my photo in place and proceeded to embellish the rest of my layout.
Above my photo I added a couple of Page Tabs; and to the left of my photo I added a Photo Cut Out tab (from the "Bright Directions Tabs 3" sheet.) I also added some Snippet Strips and bold Enamel Dots around my page.
To finish off, I added a quote from a "Happy Together" Everyday Etc card, which I cut into strips to apply; and then I added some Rainbow Heart stickers randomly across my page.
Thanks for stopping by today so I could share this with you. I will be back in a couple of weeks with another project to share.
Until then, happy scrapping! X
Thanks for stopping by today so I could share this with you. I will be back in a couple of weeks with another project to share.
Until then, happy scrapping! X
Subscribe to:
Posts (Atom)