Showing posts with label mixed media. Show all posts

Monday, 30 December 2019

Dudettes ll Chrissi Mannix

Hello Lovelies,
Chrissi here today with another layout using the Rad Retro Collection.
I decided to use a photo from a retreat back in November. I worked on my background alot for this layout. To he point where I think I over did it. In the end, I used a brayer and some paint to tone down/cover what I had done. This made it much more usable to me lol.
I used my Flutter Colour Paint, My favorite Art Foamies, the new Spot On Stencil, a fan brush and of course my brayer to put together my background.

Using the Bits and Bobs, and Flutterby Neon Enamel Dots I embellished my photo, that I had layered with Every Day Etc Filler cards, and made my title. 

Well that's it for my last post for 2019. I'll be back in the new year though, with a Project Life Layout featuring the most perfect photos for this fabulous collection.
Chrissi xxx

Saturday, 14 December 2019

Just Wanna Have Fun ll Chrissi Mannix

Hello Lovelies,
Chrissi back today with another layout with the new Rad Retro Collection.
I enjoyed playing around to create my background. I used some Flutter Colour Paint, the New Spot On stencil, and my fave Art Foamies to build up my background.
I matted my photo using the Every Day Etc Cards. I went for contrasting colours, after using all that pink in the background.
Before adding my photo, I wanted my background to pop more- I felt it was all blending together. So I added another contrasting colour of Flutter Colour Paint. I really like what this added to the layout.
For my title, this time I used pieces from the die cut Bits and Bobs set, and I couldn't help adding those awesome lips.
I hope you have enjoyed seeing what I have been creating with the Rad Retro Collection- come back soon to see what else we create.
Chrissi xxx


Thursday, 28 November 2019

Girls Just Wanna Have Fun ll Chrissi Mannix

Hello Lovelies
Chrissi again today with another layout using the new Rad Retro Collection.
This was a picture of me on my way to The Flutterby Create by The Lake 2019 Retreat. Had to stop off and get something for woine rime.
This is a really quick and simple layout, alot different to my usual. Using some Flutter Colour Paint as my base.

 But I loved the Girls just Wanna have fun every day etc card so much, I wanted it to be the main focus of the page. So no real embellishing on here. I kept it very simple.

Don't forget, the new collection is available on the website to purchase now.

Happy Scrapping
Chrissi xxx


Friday, 22 November 2019

Organised Chaos | Allara Bamforth

Morning! Happy Friday,

I'm up on the blog today with an Art Journal Page using fabulous Flutterby Design Goodies!

When ever I'm creating layouts for the blog, I usually throw any left over paint or use up the paint on my brayer in my Art Journal. This is how this double page came to life! 

The background has been started in this way, using the Flutter colour paint. I've either brayered it on or flicked and smudged it over the spread. I've then used some of the Art Foamie stamps to create some extra background interest, then mixed my paint with some clear Gel Medium and used a variety of stencils to layer it up further.


I love all the quirky sayings and quotes on the Everyday Etc Cards, so using them for your Art Journal pages is a really great idea. As well as cutting out shapes from the Filler Cards.

Art Journal pages are a great way to practice different ideas for your mixed media layouts. Once you have a collection of Flutterby Design stencils, paints and stamps, creating some Art Journal pages is a great way to use your supply.


Thanks for taking a peek.

Till next post,


Wednesday, 6 November 2019

Love This | Allara Bamforth

Happy Wednesday!

I'm back on the blog today with a stash busting layout using some of my favourite Flutterby Designs bits and pieces with a bright and colourful layout.

The background was created with some of my favourite Flutter Colour Designs paint from the Brights set which I've used my brayer to paint across half of my background on the right and then just some of the excess on the left. Subtly I've stamped some of the Art Foamies Fill It In stamps and also some of the Edgies beside my photo. I've splattered some white paint over my background to match some of the design in the title.


I used Everyday Etc Cards to layer my photo and chose a matching title. I added a Page tab and some Die Cut Bits and Bobs to the top right and bottom right of the photo. To the bottom right I added a Flair Button and to the bottom left I used a wood veneer piece that I painted in matching colours.
To the top left and bottom right I added some Sticky Quotes and finished off using some heart stickers.


Although everything I used was from different collections, I was able to find so many mix and match pieces to create something colourful!!

Thanks for taking a peek!

Till next post,


Tuesday, 29 October 2019

Create Everyday ll Chrissi Mannix

Hello Lovelies
Today I wanted to play with some paint, stencils and stamps, but I wanted to make something different. So i decided to make a 12x12 Mixed Media page to hang in my art room.
As well as some new art foamies, I've used some older bits and pieces form the Flutterby Designs Store. I have a pretty decent stash of Flutterby Designs, that I'm always saving for the 'perfect' project- which we know, doesn't exist. So you cant be scared to use your stuff instead of just storing it for one day. Which is what I tried to remember here. 
I started with my Flutter Colour Paints, and started layering those onto some black cardstock. I did start this on white, but I messed it up, and then decided the colours might really pop on some black.

Then to add more layers, I sponged through a flutterby designs stencil, and also used some of my favourite "This Way"-Art Foamies. I use paint with my art foamies, and brayer it onto the stamp to get an even application, and a bold transfer. Once i was happy with my background, I couldn't help but literally throw some white paint splats over the page.

To make a focal point for my page, i fussy cut a quote out of an older set of Every Day Etc cards. I once brought the 'Creative Chaos Kit'- The July 2016 kit. I had some awesome extras in it aswell, and that is where these circles and wood veneer came from. I thought they would be perfect for this wall hanging.

To finish off my page, I wanted to adds some grungy hand drawn lines. To add some texture and contrast. I grabbed my black pen and very roughly scribbled around a few of my different patterns. I love how this page turned out.

Hope you enjoyed my process. See you soon
Chrissi xxx


Sunday, 13 October 2019

You are a Work of Art ll Chrissi Mannix

Hello Lovelies
Chrissi back today. I've recently been having fun with some of my older Flutterby Designs Stash and today I want to share with you a mixed media layout using some of these awesome bits n pieces.
I used my new favourite "Make your Mark' art Foamies, and Flutter Colour paint to make my background. I love the bold coulours and how they pop beautifully against the black and white. Using my brayer, I inked up my art foamies to stamp onto my background, then added my paint streaks.

Using the Every day Etc Cards from a few different collections, I not only matted my photo, but also used a quote card as my title. I adore these cards for titles, so many awesome quotes to use. I also added some Flutterby flair buttons, and enamel dots to finish off my page.


If you would like to see how i made this page, check out the process video here.


Thanks for stopping by
Happy Scrapping
Chrissi
xxx

Sunday, 28 July 2019

Just a Bit Crazy ll Chrissi Mannix

Hello Lovelies,
Welcome to the blog, My turn to share with you today. 

Last week I was lucky enough to be at the Flutterby Designs "Create by the Lake" Retreat. It was my first year, and if you ever have the chance to go, totally do it. Anita puts on a kick ass retreat, and seeing as its my first post back, I thought I'd scrap a pic from retreat, and use a little technique I learnt from one of  Neet's classes- again, if you ever have the chance, do one of  Neet's classes, so good.

In Anita's class, she showed us how to make an awesome mixed media background to use in various projects. I loved the technique so much, I wanted to turn it into a layout. Starting with blobs of  my Flutter Colour Paints on some cardstock, I rolled it our with my brayer. Adding more paint and colour untill I was happy with the background. Then to add a pop of white, I literally just threw my paint over my layout. Took a little to dry, but so worth the result.
Too add some more interest to my page, I added some modeling paste through the Flawsome Stencil. You don't end up seeing much of it, but it just adds something to the page. I then matted my photo on some of the Every Day Etc Filler Cards
As I  have done before, I also used the Every Day Etc Cards as my title. I love fussy cutting these to use as titles and embellishments. I added some tiny alphas and some stamping to finish my title.
This layout was alot of fun to do, and I loved the process. If you want to see the process, check out the video in the link.
Thanks for stopping by
Chrissi xxx


Saturday, 27 July 2019

Live Love Laugh | Tamara Buckler

Hello to all my beautiful lovely Flutterby Friends,

I'm very sad to say that I'm on the blog today with my last share as a Flutterby Design Team member. It has been a blast over the last few years, but unfortunately life has got in the way a little bit this year and I just cant keep up with my creative commitments.

So, today I am going out with a bang and sharing with you a series of art works I created for the charity auction hosted at the recent Create By The Lake retreat.


To start the canvasses, I prepped them with gesso and then painted the outer edges with black FlutterColour paint. I applied random bits from magazines and books to the canvas using mod podge, attempting the photo transfer technique, which worked with various degrees of success.  I also adhered random bits of Cut Files from Cut to You, and this worked well to add texture and interest.


Over the top of all this I started to apply various paints including some FlutterColour paints, working from the outside in. I then applied some paint through various Flutterby stencils, for added interest and focus. Over the top of all this I added various splatters, doodles and dribbles.


To create the focal words, I used the Large Alpha Set Stencil, and outlined the letters just using a sharpie, and then highlighted with posca pens and paints.

I was very nervous about contributing these art works to the auction, as I have never done anything like that before. I am super pleased to say they sold, and the lucky winner was none other than our boss lady Anita. So pleased that these will be getting lots of love at her place!


Thanks so much for your support and love over the years! I'm sure I will still be hanging around soaking up all the inspiration, and look forward to seeing what the future holds for the Flutterby crew.

Biggest Loves,
Tam xo


Saturday, 13 July 2019

Boss Girl ll Chrissi Mannix

Hello Lovelies,
Today I'm scrapping some pics of my gorgeous niece, and what better collection, for this strong willed, sassy princess, than the We run The World Collection. I love being able to use this collection.
My niece is a very strong willed, sassy, adorable little princess, with one hell of a personality. This collection couldn't be more perfect to scrap some of her sassier moments lol. I scrap her pictures in 8.5x11 which has been a challenge for me over the year, but I'm getting better. I start with smaller photos, and I find this helps me with real estate on the page. Makes it easier to use the Every Day Etc Cards Filler Cards to layer aswell-which I love to do.
Because I cant help but add some bright colour and mixed media to my page, I applied a base of hot pink paint to my background, and then used some white paint to add some random paint lines and add texture and interest. The pink really makes everything else pop.
I adore using the Every day Etc Cards for titles and embellishments on my pages. The awesome quotes are always fun for sassy titles. The die cut pieces have some great embellishments, and i found this awesome crown that embellished my photo perfectly. I feel like it really made the whole page pop, and brought out the sassy in this photo. I love how this age turned out- I hope you do too.
Happy Scraping, I'll be back soon
xxx

Wednesday, 10 July 2019

One of a Kind || Elisa Ablett


Hi Flutterby Fans,

Elisa here from the design team with my latest creation for you along with a step by step on how I created my background and tips on using the Art Foamies stamps.

Before we start the tutorial, lets take a quick look at some of the products I used to create with from the Flutterby Shop, a few bits and pieces from past kits as well.


So lets take a look at how I created the background - 


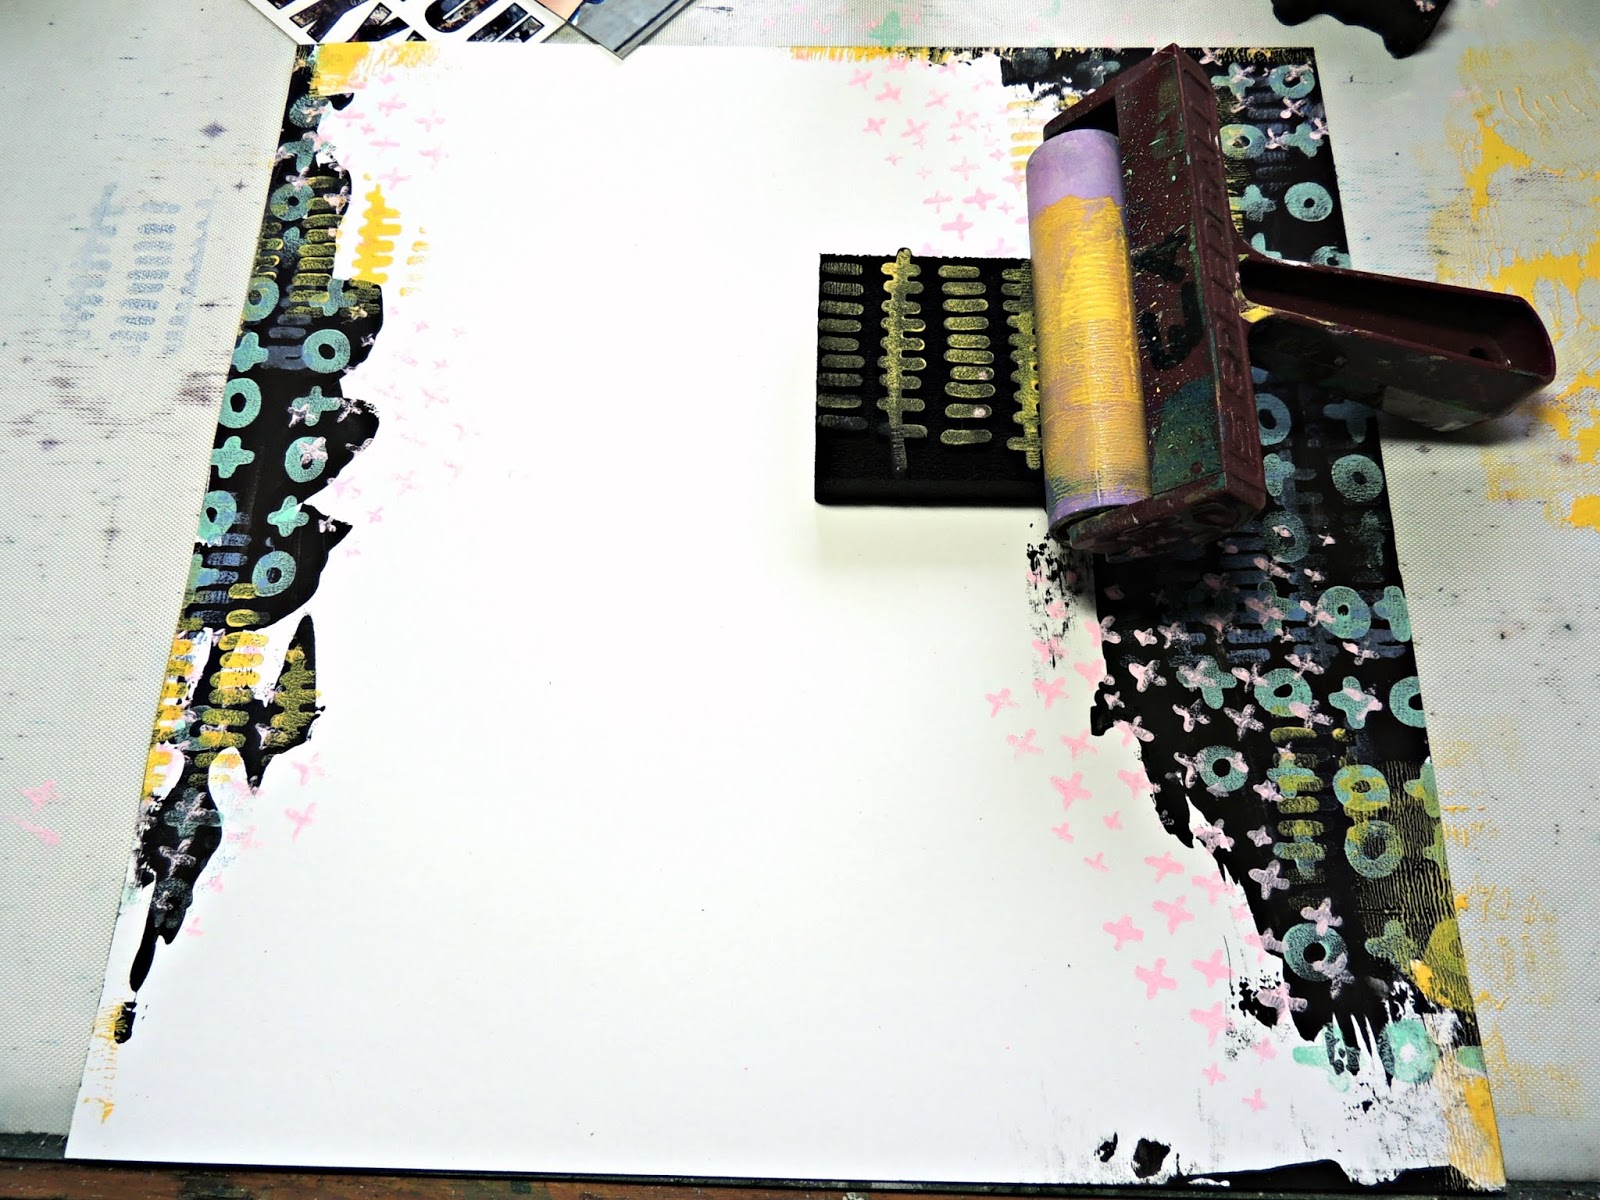
Using a palette knife, spread black gesso or thick black paint over the left and right hand sides of your background paper. Let it dry or heat dry.


Use a brayer and a craft mat to 'load' up your art foamies stamp, i find the paint goes on smoother and you get a better print. This is also a great way to add more than one colour at once!


Dry each layer and each colour before you add your next lot of stamping. Add a lighter contrasting colour over the top and then bring that out onto your background paper as well. 


I only wanted to add a small amount of yellow to the page so I only added colour to a small portion of the stamp and also used my 'clean' palette knife to spread it along the edges of my paper a bit as well.


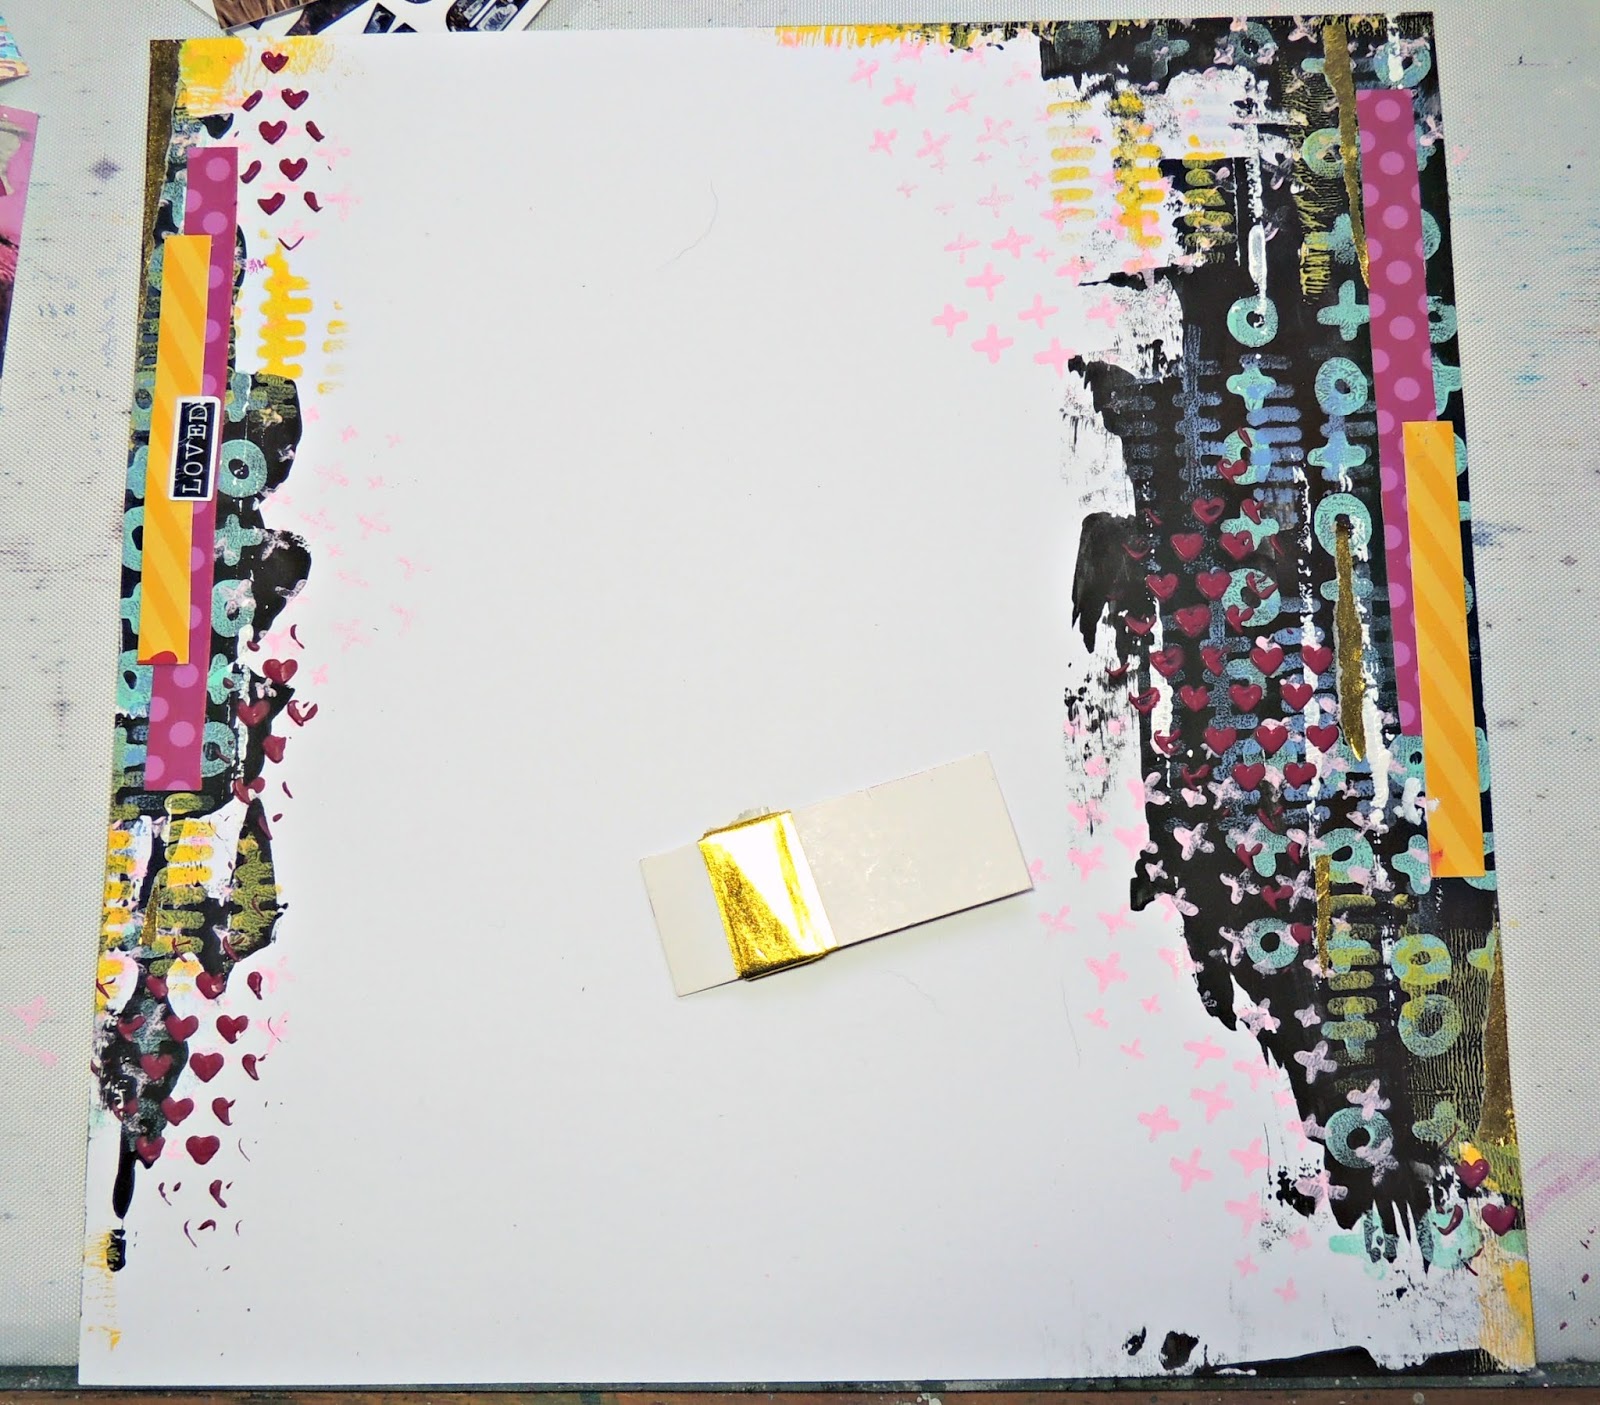
Add some cool white stripes to your page using the edge of your ruler. Add white paint to your craft messy mat, spread it out using a palette knife and then dip your ruler into the white and 'stamp' onto your page, keep stamping until you have the lines and effect you want.


Add smears or splatters of white paint to your page using your finger, and splatters with a fan brush.


Using the palette knife again, spread pink paint through the Little Big Love Flutterby Stencil as shown in the photo above. The let dry before you add anything else. Once dry, tear strips of gold washi tape from a past kit and add to your background then stick your desired strips and stickers over the top.


Layer Filler Cards under your chosen photo, I chose bright and funky filler cards to match my background.


Stick down your photo cluster and then add your title ! I outlined my photo in black pen to make it stand out a bit more. 

Here are some close ups :-) 


I hope to see your creations using my background technique.

Thanks for stopping by the blog today, make sure you leave me some love!

Hugs

Elisa x